Floating Wall Shelf
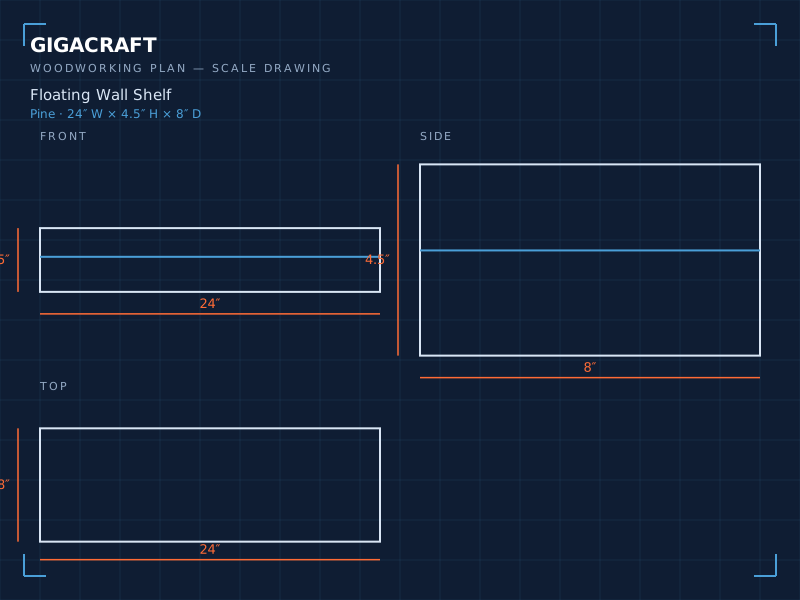
A clean, hardware-free shelf that hides its mounting cleat inside a hollow box. Rides flush on the wall and holds books, frames or a small plant.
Difficulty Beginner Category Storage Time 90 min Cost $18 Primary wood Pine
01Materials
- 1×6 pine, 8 ft
- 1×2 pine cleat, 4 ft
- 1-1/4 in drywall screws
- Wood glue
- 220-grit sandpaper
02Cut List
| # | Part | Dimension | Note |
|---|---|---|---|
| 01 | 2 × 1×6 | 24 in | top and bottom |
| 02 | 1 × 1×6 | 22.5 in | front face |
| 03 | 2 × 1×6 | 6.5 in | end caps |
| 04 | 1 × 1×2 | 22.5 in | wall cleat |
| 05 | 1 × 1×2 | 20 in | front filler |
03Tools
- Miter saw
- Drill/driver
- Countersink bit
- Level
- Clamps
- Stud finder
04Build Steps
- Cut the box parts. Cut the top, bottom, front face and two end caps to length from 1×6 stock. The front face is shorter than the top so the ends cap over it.
- Assemble the box. Glue and screw the front face between the two end caps, then attach the top and bottom so the seam faces down and back.
- Install the cleat. Screw the 1×2 cleat to the wall into studs, level, with the angled face up if you beveled it. Use drywall anchors only where no stud exists.
- Hang the shelf. Set the hollow box over the cleat so the back edge catches it, then drive one screw down through the top into the cleat.
- Sand and finish. Sand to 220 grit, wipe clean, and finish with clearcoat or paint. Let it cure before loading.
Safety First
- Locate studs before drilling; a shelf loaded at the front pulls hard on the cleat.
- Keep fingers clear of the drill when driving into the top edge.
05Pro Tips
- Bevel the cleat 45 degrees so the shelf seats tight against the wall.
- For heavy books, add a second cleat and bump the top to 3/4 in stock.